Last modified September, 1996 - Armel Le Bail
Before to run STRUVIR, you should first create an initial data file containing the cell parameters, the space group and the atomic coordinates of the crystal structure you wish to explore/see/draw (and also some special instructions necessary to prepare specific drawing).
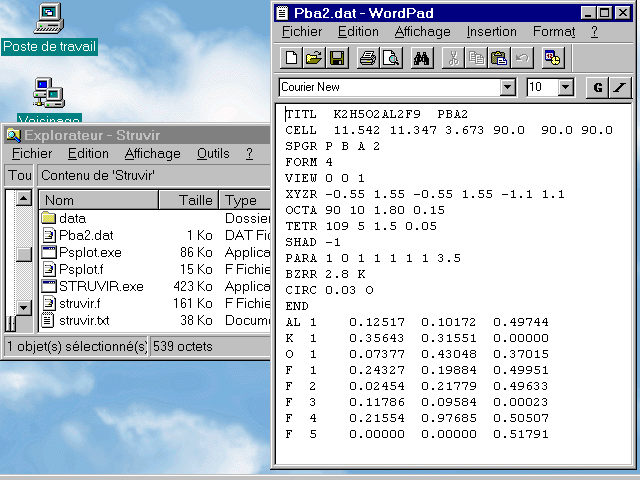
The data file should have a .dat extension and should be on the same directory as the executable STRUVIR.EXE. For now, all the test files are stored at the subdirectory C:\STRUVIR\DATA. If you have not your own crystal structure to build you may copy one of the examples C:\STRUVIR\DATA\pba2.dat to C:\STRUVIR\pba2.dat as a test file. You will be forced to edit frequently these .dat files so that you may associate WORDPAD to them so that they will be edited by a double-click on their name in the file explorator:
The test file pba2.dat contains a lot of unknown command lines s for a beginner. However, STRUVIR has default options so that you can reduce the content of pba2.dat to its most simple understandable expression :
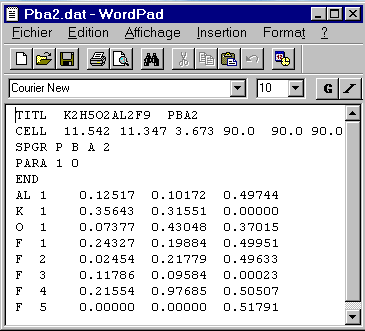
Now all should be clear for you in pba2.dat (the instructions TITL,
CELL, SPGR,
END are really self explanatory) with
the exception of the PARA instruction
:
PARA 1 0
This line means that the plot is scaled to the full width of the paper
(1) and that the space group has no center at the origin (0). If the space
group had been centrosymmetric, no PARA instruction was necessary because
it is the default case.
WARNING:
Note that ALL LETTERS MUST BE AS UPPERCASE
The default input of all data is in free format
(but UPPERCASE). Numbers or symbols are separated by blanks, typed in any
arbitrary column between columns 5 and 80. The first four columns of the
instruction data are reserved for options specifying the type of instruction
(here TITL, CELL,
SPGR, PARA
and an exception for END with three
columns). Any text in the first four columns, other than the options listed
here (and more fully elsewhere), will be
ignored. Numbers can be given as integer, floating point, or floating comma
numbers; all three types will be transformed to floating point numbers.
Atom parameters may be given in free format or fixed format as described
below.
The sequence of instructions is arbitrary except that TITL and END must be the first and last options, respectively, followed by the atom parameters. When the default free format is used, the atom parameters are given as follows : an atom name (always in UPPERCASE: AL, CO, BE, MO... not Al, Co, Be, Mo...) consisting of two letters is expected in the first two columns, followed by a sequence number and the X, Y, Z-coordinates.Up to 40 characters can be plotted as a heading. TITL must be the first option, even if the text is left blank. Subsequent lines, starting with TITL, are without action and can be used as comments.
If your minimum test file is ready (the above pba2.dat modified file or one of your own), then, run STRUVIR by double clicking on STRUVIR.EXE from the file explorator (you may have put a shortcut somewhere on your screen too or you may open a DOS box and type 'STRUVIR' in the C:\STRUVIR\ directory):
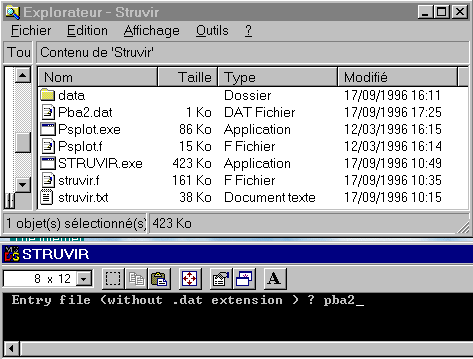
You should have seen a DOS box to appear in which you are prompted to give the entry filename without the .dat extension. So, type 'pba2' and then push the 'Return' keyboard button. STRUVIR then reads the pba2.dat file and creates the printable output file struvir.imp, the wireframe VRML file wi.wrl, the polyhedra VRML file po.wrl and the struplo.pov output for Povray. If polyhedra are located, they are listed :
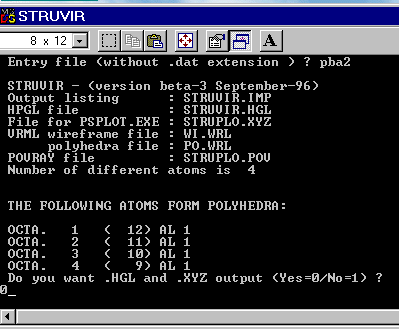
You have now the option to create (0) or not (1) the generic plot file struplo.xyz for PS output (struplo.ps will be built possibly from struplo.xyz by the PSPLOT.EXE program) and the HPGL plot file struvir.hgl. Depending of the model size, calculation may take a few seconds there after you have entered 0 or 1 followed by a 'Return'. The end of calculations is marked by the automatic disparition of the DOS box.
Coming back in the C:\STRUVIR directory, you can see a lot of new files having appeared :
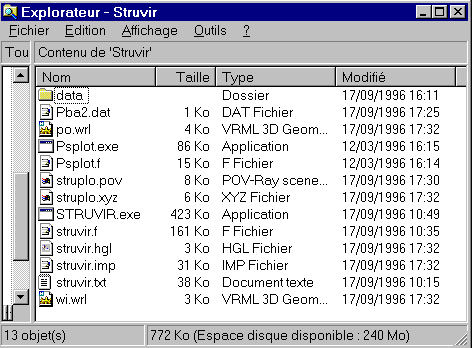
Choosing '0', STRUVIR has created :
More details about the VRML, HPGL, POSTSCRIPT and POVRAY drawings are given later in the tutorial. If you have yet installed a VRML viewer (the standard Netscape 3.0 version is normally pre-equipped with the Live3D plug-in), you have the possibility to see something from this default run. As indicated below, the presentation is with the 'flat shading' option, also the lamp button was used to play with light for a best view :
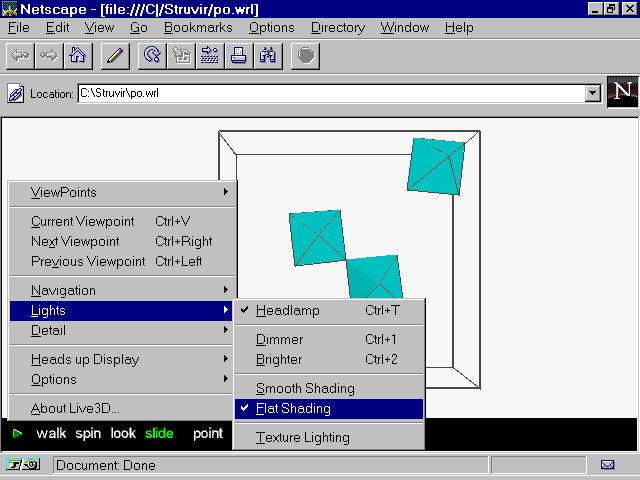
WARNING : If your structure does not contain octahedra and/or tetrahedra fitting inside the default interatomic distances stored in STRUVIR then the po.wrl and wi.wrl files will contain nothing to see at this stage.
At this stage, you will have to edit the struvir.imp file and examine distances and atom coordinations in order to be able to give more indications to STRUVIR about what you want to draw. This is the subject of the next step.
Note that the polyhedra (plus circles) and wireframe renderings are for now the only rendering modes in STRUVIR : no stick, ball-and-stick, CPK (...) modes.